Stepwise explanation of tool to migrate Exchange to Live Exchange Server.
Following steps need to taken to move from Exchange to Live Exchange.
Step 2
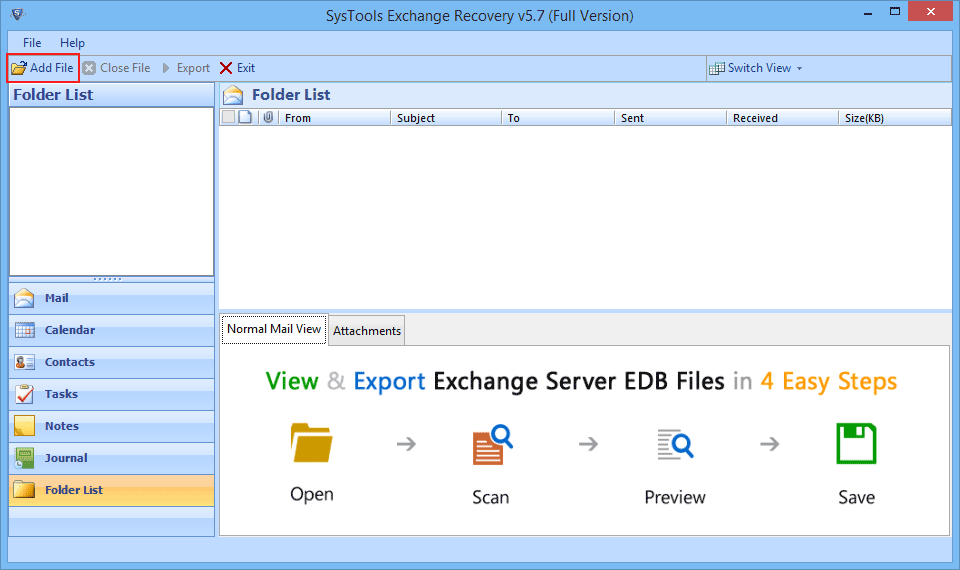
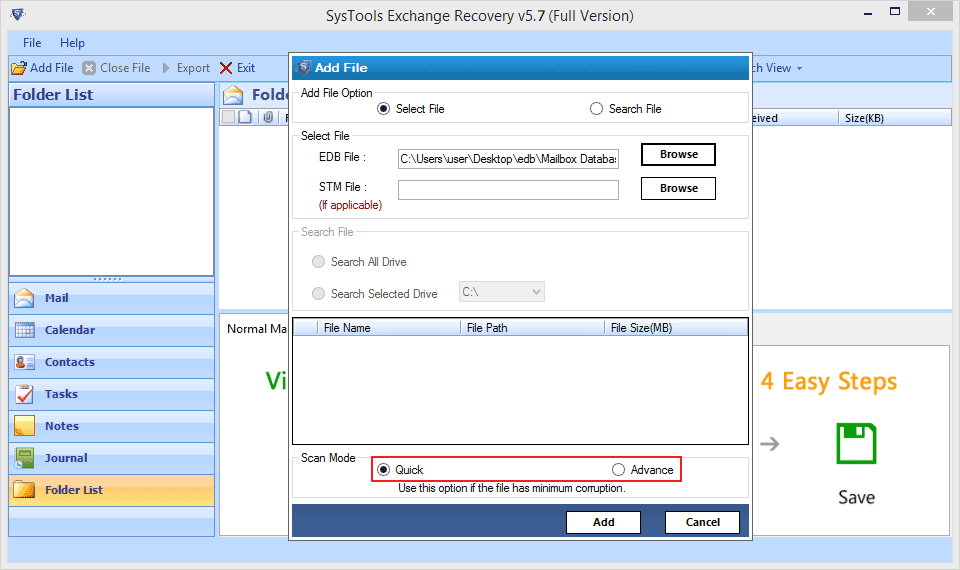
Run the software and click on Add File.
Step 3
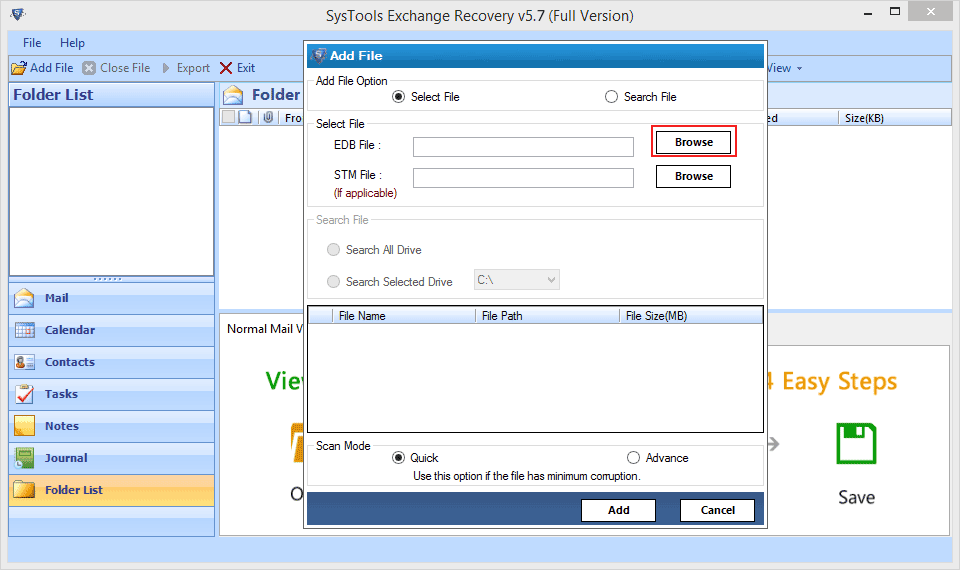
In select file section browse for EDB file in Drives.
Step 4
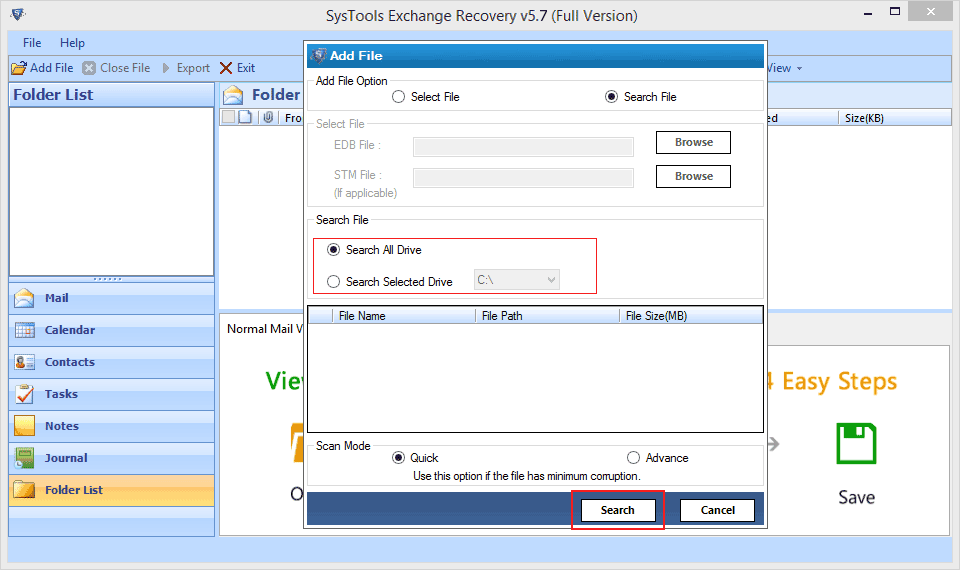
If you don't know the exact location of EDB file then choose Search file option.
You can search EDB file in either Search All Drive or in Selected Drive Option.
Step 5
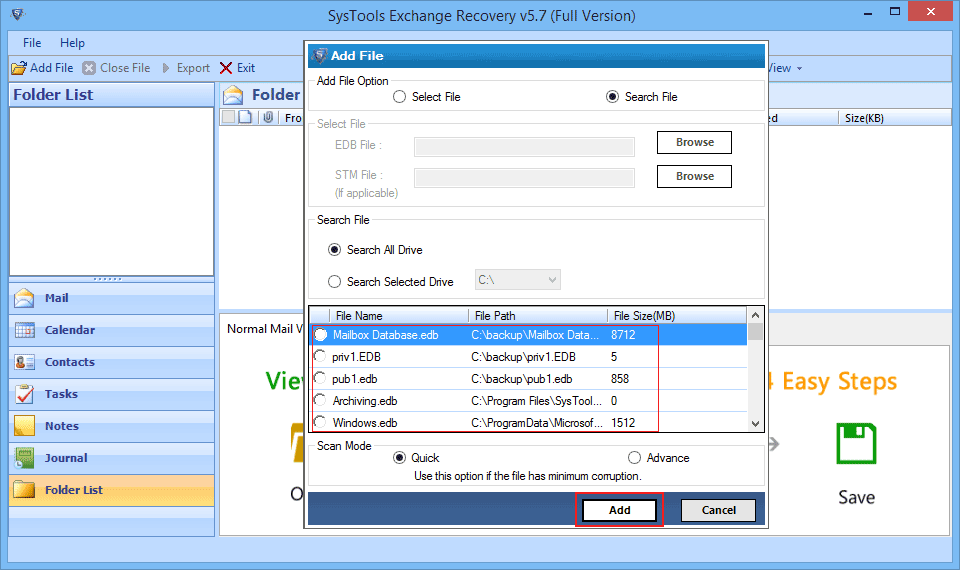
After this, software will list all the EDB files found from the searched Drives.
Step 6
Now Select Recovery type from Quick and Advanced scan mode.
Advance mode option is selected if your EDB file is highly corrupted.
Step 7
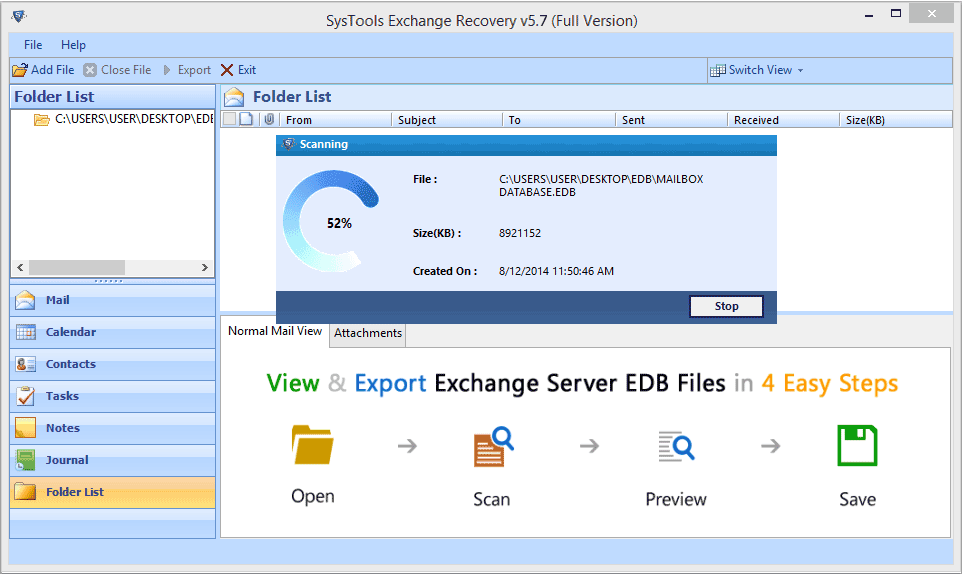
A small window appears showing the scanning process.
Step 8
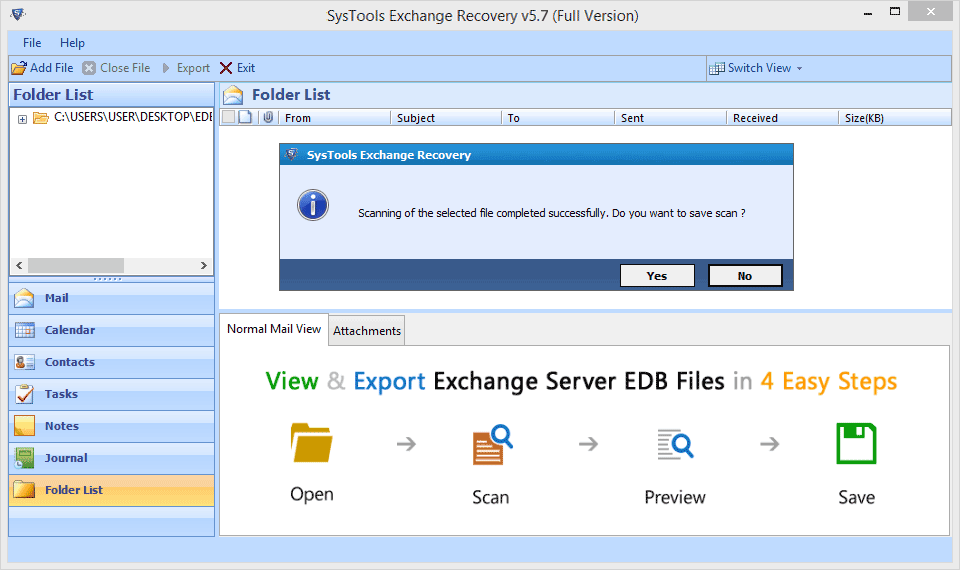
Next window shows the message of successfull scanning completion and give an option to save the scanned file.
Step 9
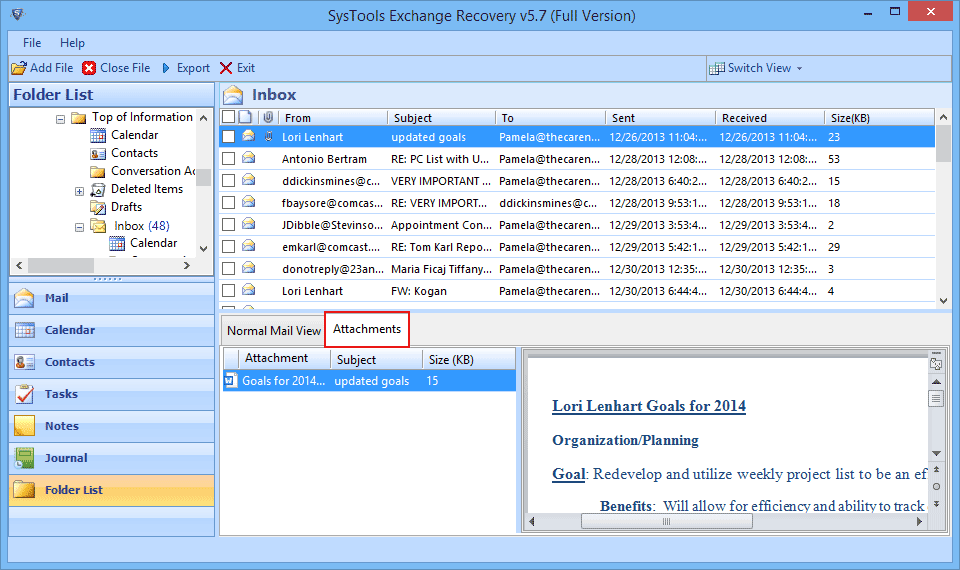
All folders and items of that EDB file will be shown in the left side panel, you can explore it by clicking on '+'. A preview of all mails will be displayed.
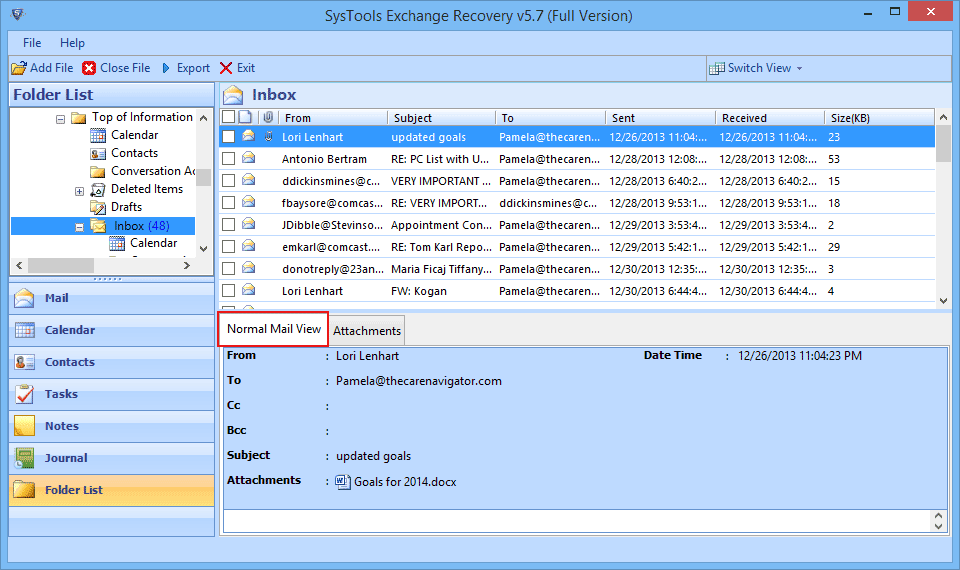
Attachment view gives the preview of all the attachments in mails.
Step 10
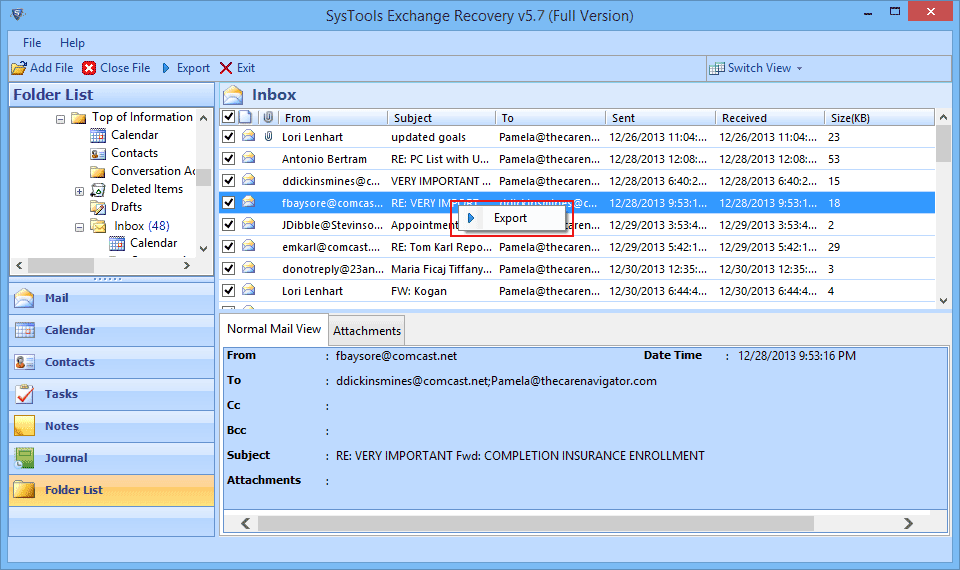
Now you can check the mails you want to export, after selecting right click the mouse and hit on export option.
Step 11
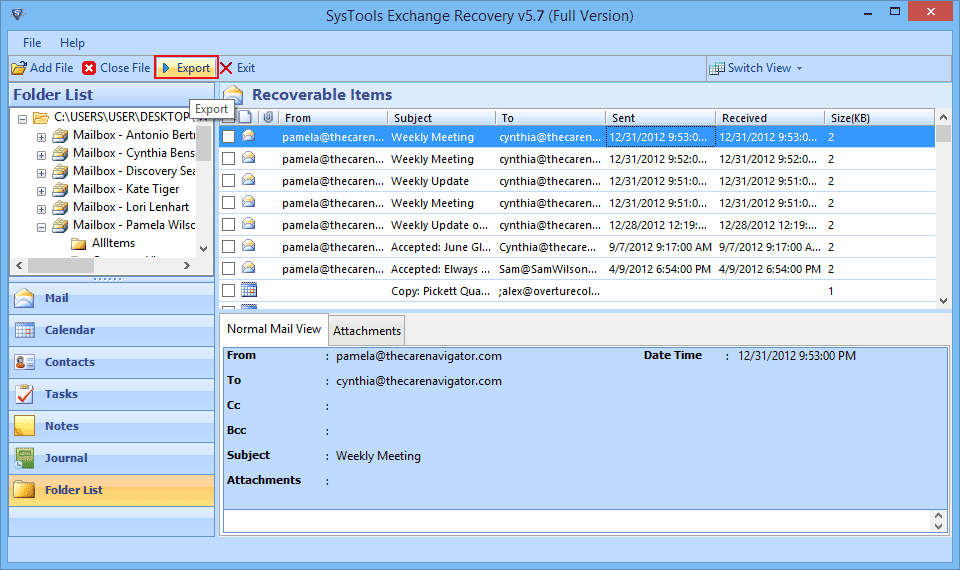
For migrating whole data of mailbox to Exchange Server, click on Export from top header section.
Step 12
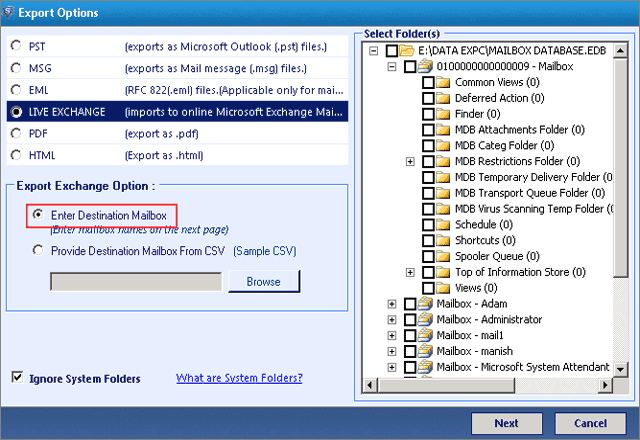
Select the Live Exchange option from Export Options.
Step 13
Enter the valid Mailbox name and then click on Export.
Step 14
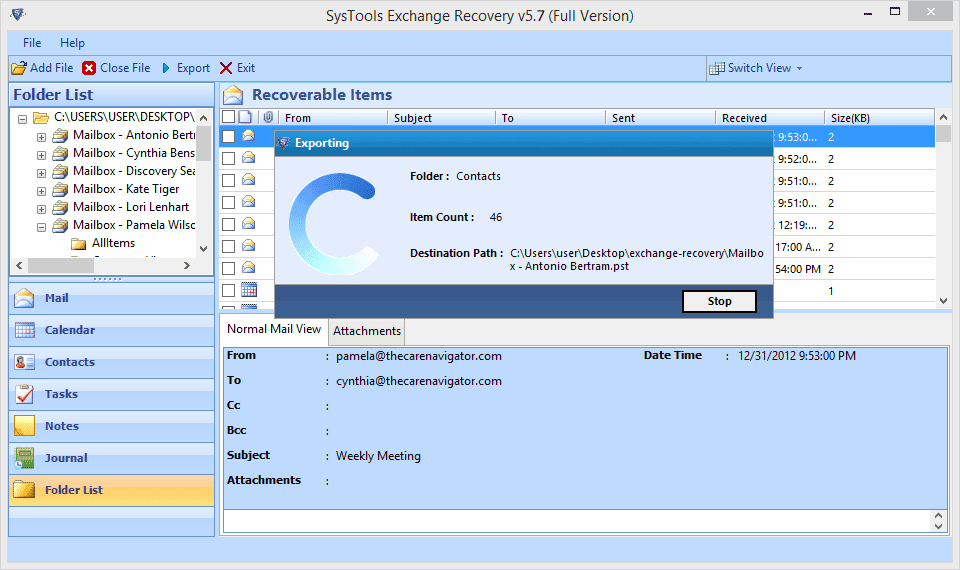
A small pop-up window appears showing migration status displaying folder name, number of items and path of destination.
Step 15
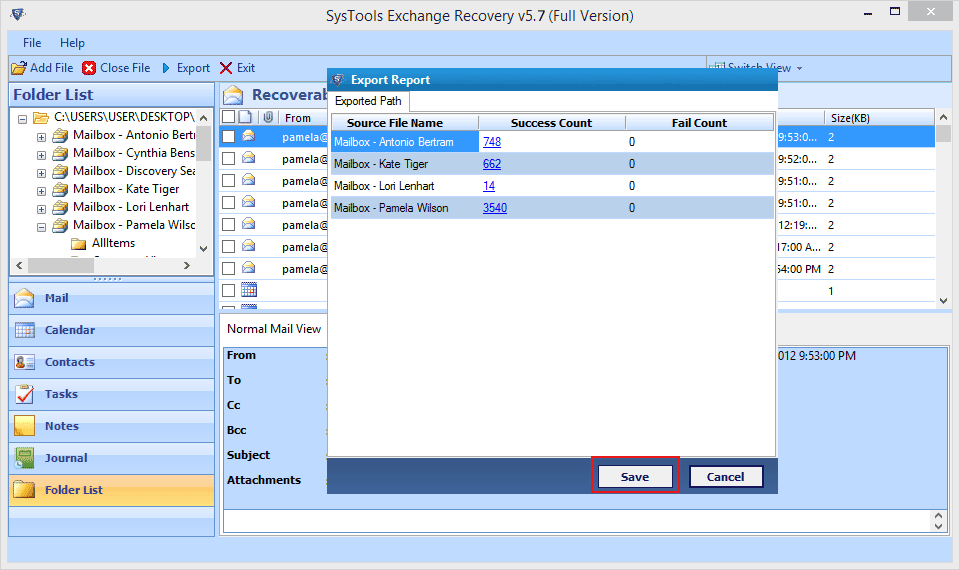
At last tool will generate an Export Report which can be saved in CSV format.
Step 16
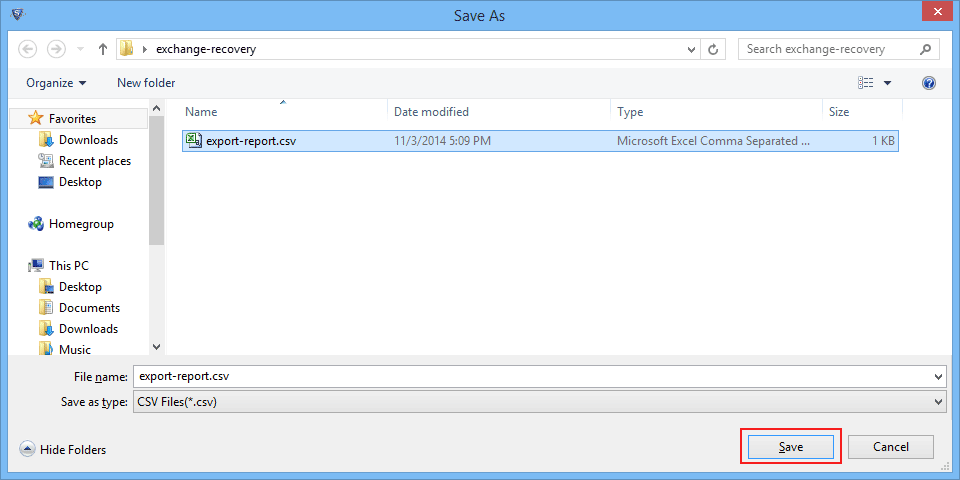
To save report at a desired location browse the path.
Step 17
A window appears showing saved location of CSV report.
