Step by Step Process of Server Migration
To understand "How software Works" simply analyze working process of software, here we provide you simple steps to carry out server migration in straightforward way.
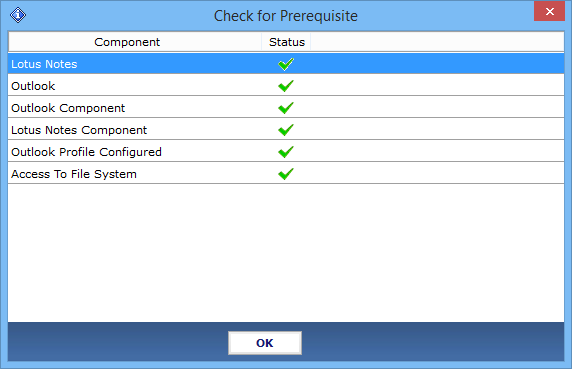
Step 1
Install and Run the software. The software will check the following prerequisite.
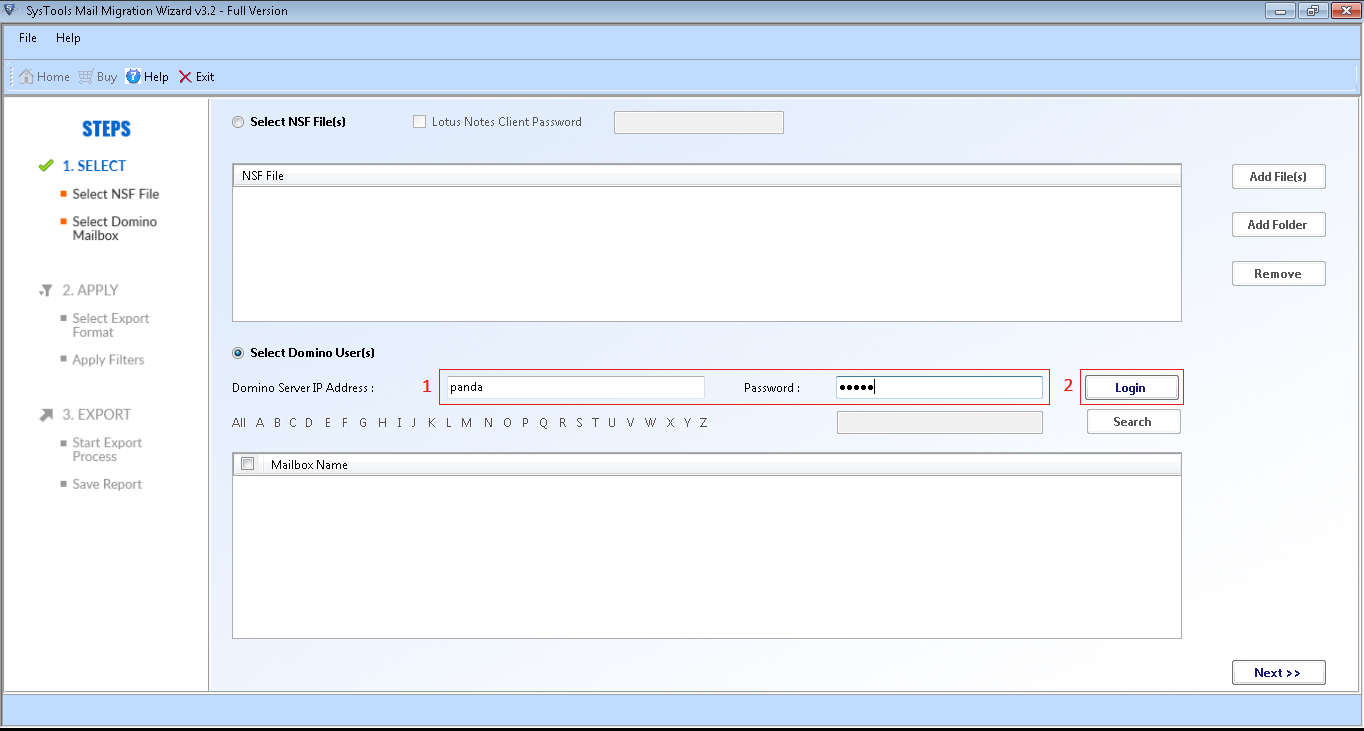
Step 2
Go to Select Domino User(s) and enter Domino Server IP Address and Password and click on Login button.
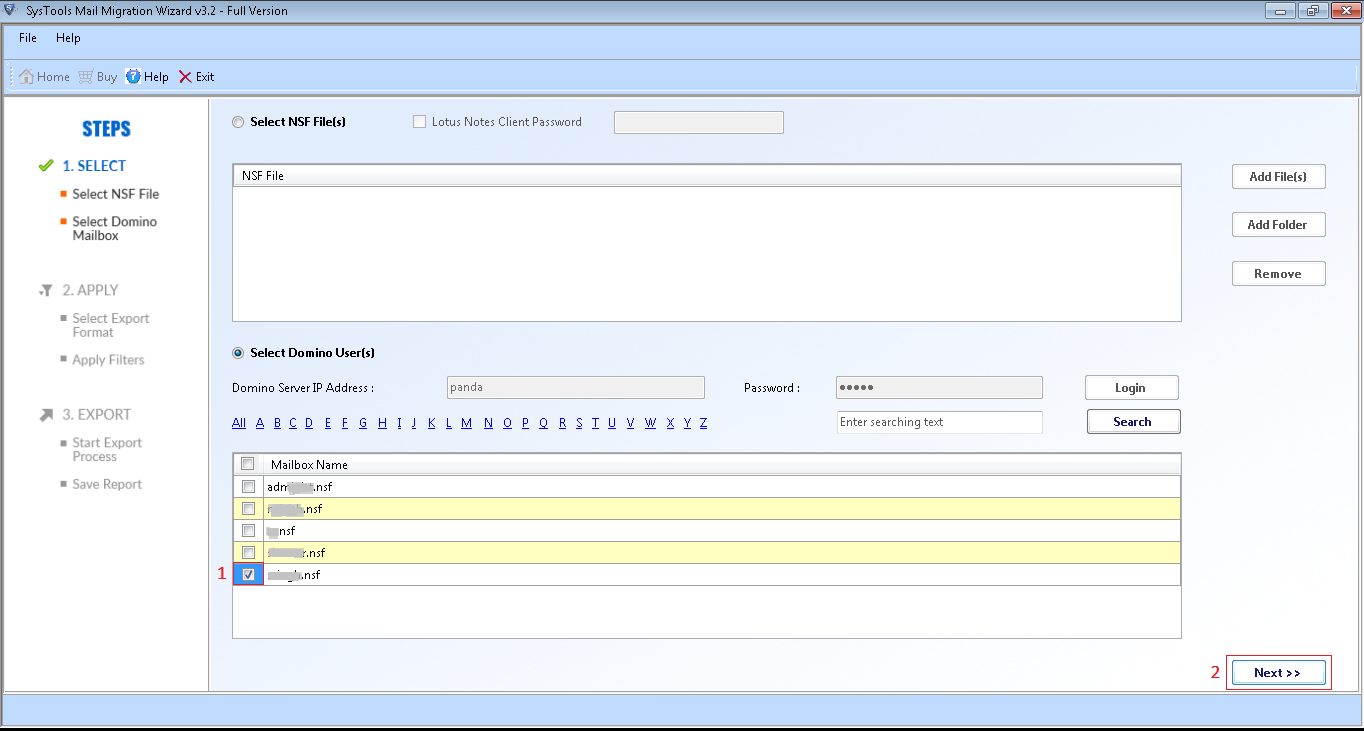
Step 3
All the NSF files of that Domino server will be listed. Select the Mailboxes need for Migration and click on Next.
Step 4
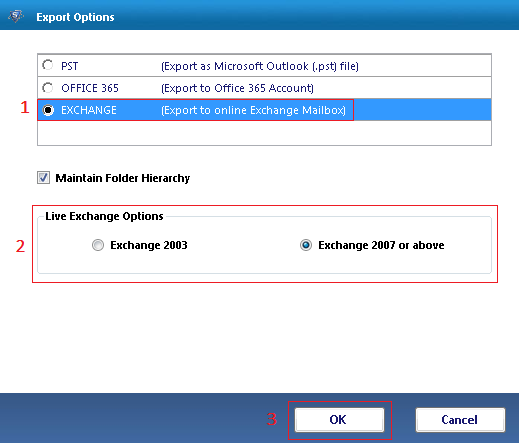
Select Exchange from Export Options and select the Exchange Server versions in which you want to process your migration from Live Exchange Options Click OK.
Step 5
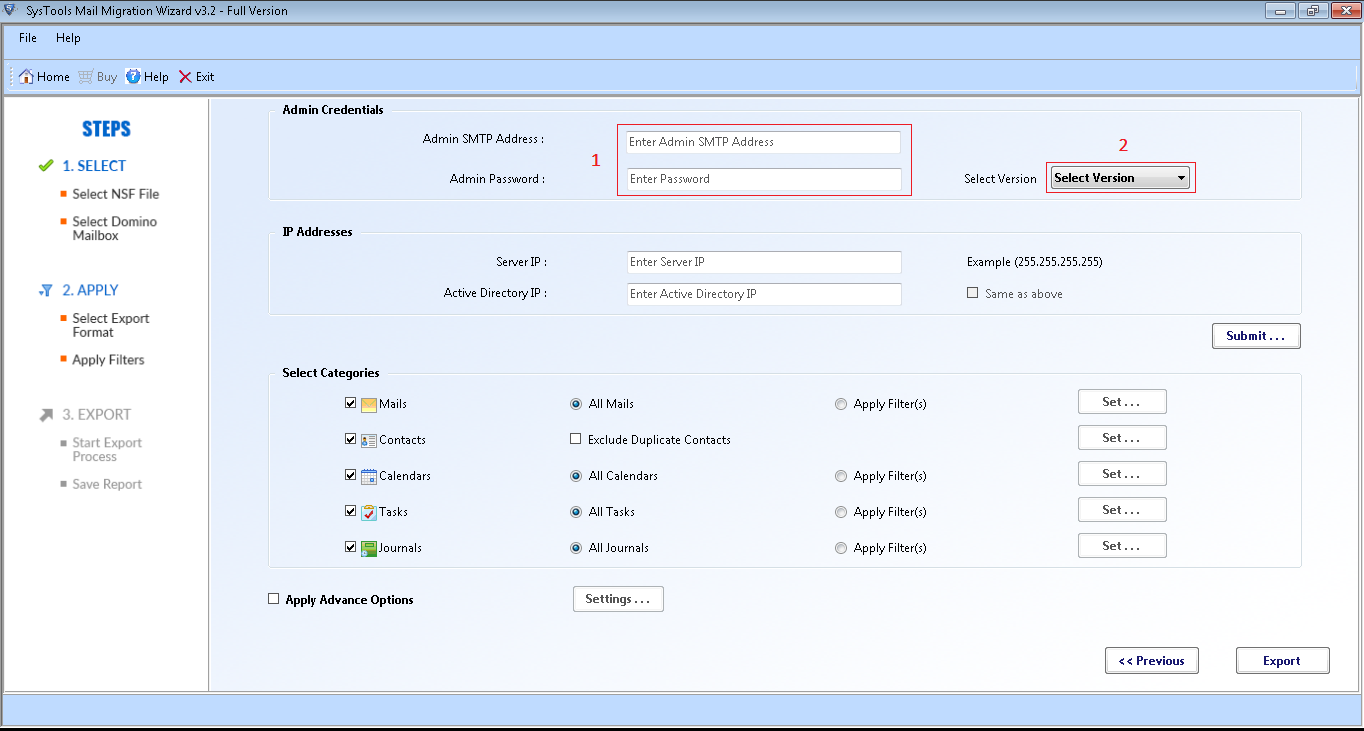
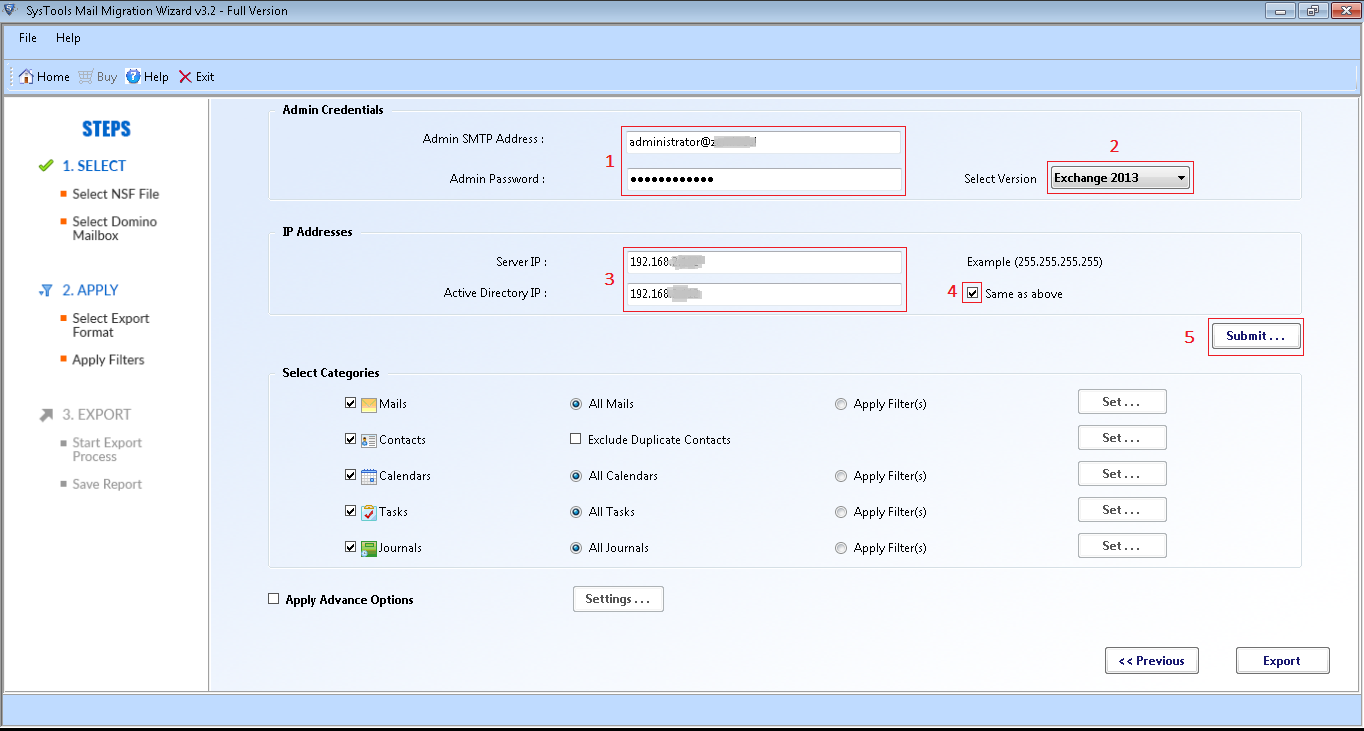
Enter the Admin ID and password of Exchange Server and after that select the version of Exchange server.
Step 6
Next enter the Exchange Server IP Address and Active Directory IP. Click on same as above if both IP's are same and hit on Submit button.
Step 7
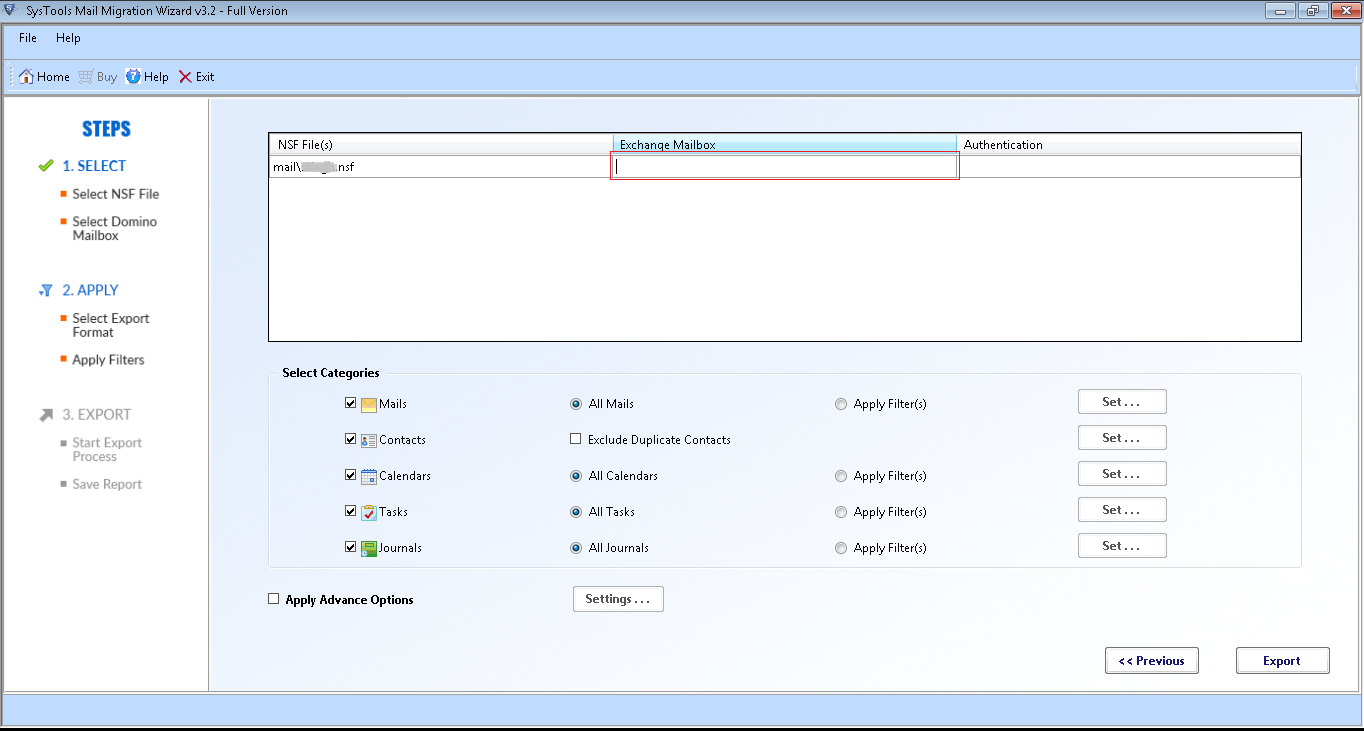
Write the Mailbox Name of Exchange server in below field in which you want to migrate your domino server NSF items.
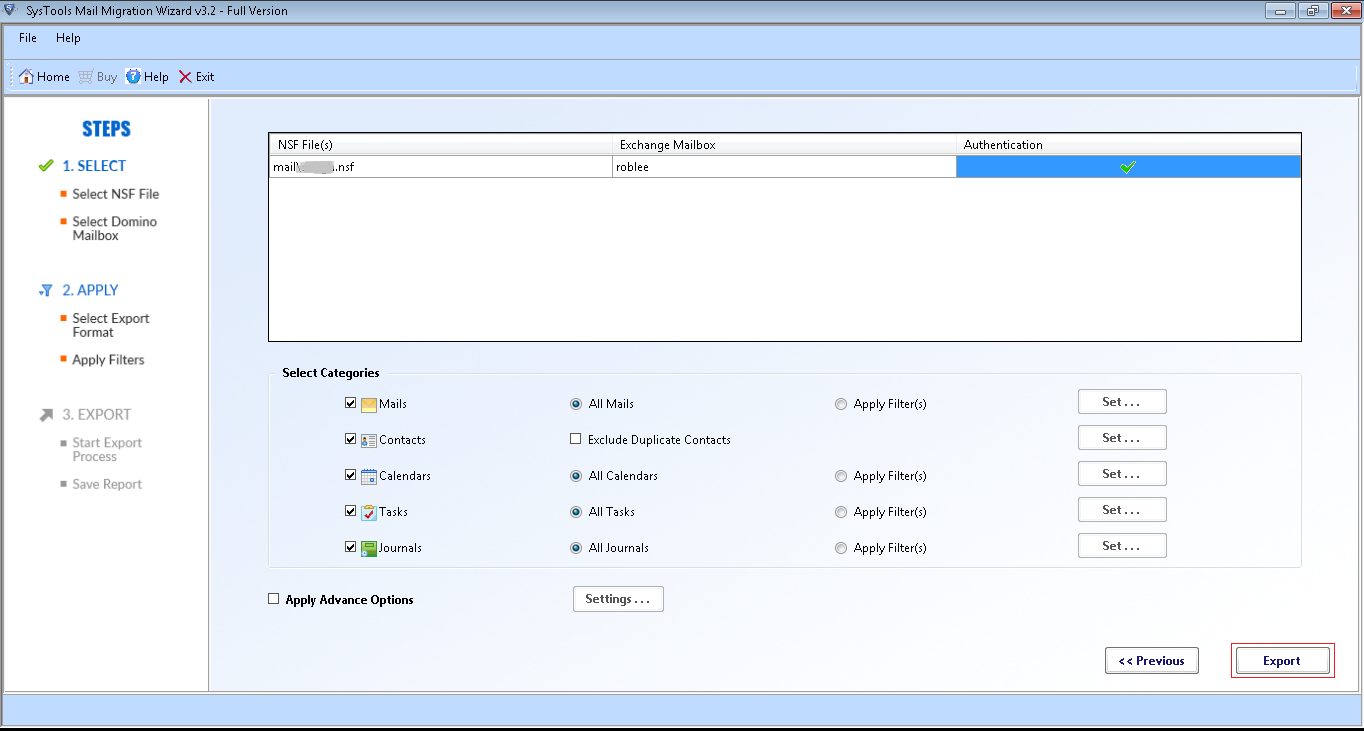
Step 8
Next the software will give the authentication to the Mailbox. Select the items from the categories and apply various filters accordingly. Click on Export option.
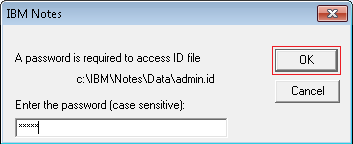
Step 9
A small window will appear which asks for password of Domino Server Admin. Enter the password and click on OK.
Step 10
Progress of Migration will be seen and after it gets completed a message will appear Migration completed successfully. Click on OK. A complete Migration report will be generated by the software.

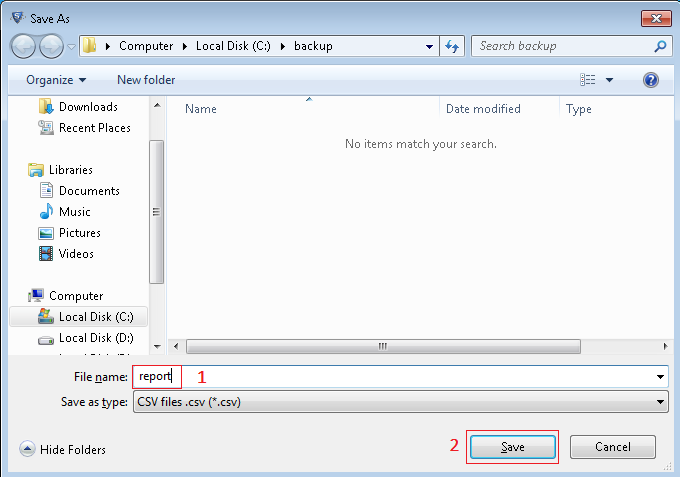
Step 11
Save the Report at any location of your machine.